
Creating and Managing Private RubyGems with Jeweler, Github and Bundler

We probably don't need to sing the praises of open source software to anyone. Of course, closed source has its place too. Not all code can or should be shared, whether it's proprietary or simply not ready to share yet.
Github has become our repository of choice for both open and closed source code. These days, much of our code is Ruby and so many of our libraries get packaged as gems. We've found Jeweler to be the easiest way to create those gems and Bundler to be the best way to manage them in projects.
This article describes how we use Jeweler, Github and Bundler to create, host and manage our private gems.
Create a new repository
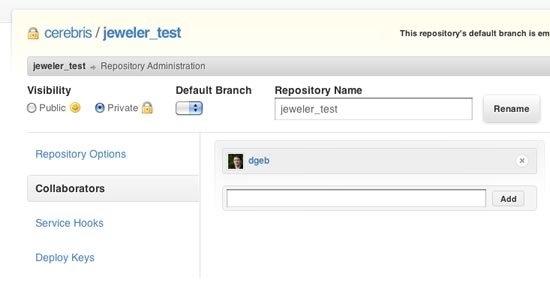
Start by creating a new private repository at Github (you'll need a paid account to create private repositories). Optionally add collaborators.
Create a Gem with Jeweler
Install the jeweler gem:
1 |
$ gem install jeweler |
Create your gem:
1 |
$ jeweler jeweler_test |
Configure the remote repository for your gem:
1 2 3 |
$ cd jeweler_test $ git remote rm origin $ git remote add origin git@github.com:YOUR_ACCOUNT_HERE/jeweler_test.git |
Check out the options that Jeweler provides:
1 2 3 4 5 6 7 8 9 10 11 12 13 14 15 16 17 18 19 20 21 22 23 24 |
$ rake -T rake build # Build gem into pkg/ rake clobber_rcov # Remove rcov products for rcov rake clobber_rdoc # Remove rdoc products rake console[script] # Start IRB with all runtime dependencies loaded rake gemcutter:release # Release gem to Gemcutter rake gemspec # Generate and validate gemspec rake gemspec:debug # Display the gemspec for debugging purposes, as ... rake gemspec:generate # Regenreate the gemspec on the filesystem rake gemspec:release # Regenerate and validate gemspec, and then commi... rake gemspec:validate # Validates the gemspec on the filesystem rake git:release # Tag and push release to git. rake install # Build and install gem using `gem install` rake rcov # Analyze code coverage with tests rake rdoc # Build the rdoc HTML Files rake release # Release gem rake rerdoc # Force a rebuild of the RDOC files rake test # Run tests rake version # Displays the current version rake version:bump:major # Bump the major version by 1 rake version:bump:minor # Bump the a minor version by 1 rake version:bump:patch # Bump the patch version by 1 rake version:write # Writes out an explicit version. |
We don't want to mistakenly release our private gem to Gemcutter, so comment out
the following line in your Rakefile:
1 |
# Jeweler::RubygemsDotOrgTasks.new |
While you're editing your Rakefile, fill out your gem's details such as
summary, description, etc. (look for the TODOs). When using Jeweler, you should
edit these details in your Rakefile and not your gemspec file, which gets
auto-generated.
Running rake -T again should confirm that the gemcutter:release task is now
missing. Without this task, the release task will release to Github but not
Gemcutter.
Let's version our gem, create a gemspec (using the details from the
Rakefile) and then push an initial release to Github:
1 2 3 4 5 |
$ rake version:write MAJOR=0 MINOR=1 PATCH=0 $ rake gemspec $ git add -A $ git commit -a -m "initial commit" $ rake release |
The process is very similar for future releases:
1 2 3 4 |
$ rake version:bump:patch $ rake gemspec $ git commit -a -m "made some changes" $ rake release |
Include your gem with Bundler
Bundler makes it easy to include your gem in your projects. Simply add the
following to your Gemfile:
1 |
gem 'jeweler_test', :git => 'git@github.com:YOUR_ACCOUNT_HERE/jeweler_test.git' |
Do you want a specific version of your gem? Specify one with :tag:
1 |
gem 'jeweler_test', :git => 'git@github.com:YOUR_ACCOUNT_HERE/jeweler_test.git', :tag => 'v0.1.0' |
Bundler will pull your source, build your gem and install it with a simple call to:
1 |
$ bundle install |
That's it! Your private gem should now be bundled with your project.
Open sourcing your gem later
If you decide to open source your gem later:
- Change its visibility to public in Github;
- Uncomment
Jeweler::RubygemsDotOrgTasks.newfrom your gem'sRakefile; and, rake releasewill now release your gem to Github and Gemcutter simultaneously.
Update 3/21: John McAliley has written up a great tip for using two sources for a gem in different environments with Bundler at his "Cowboy Coded" blog. This approach works well for developing gems alongside Rails apps.
Update 7/22: Thanks to dwradcliffe's comment below, the process of removing
the gemcutter:release task has been greatly simplified.